Fungi functional guild (FunGuild) analysis
This is a basic Fungi functional guild (FUNGuild) analysis tutorial. This tutorial dose not require installation, you can simply use Rstudio Cloud on your browser.
เว็บเพจนี้สอนวิธีการวิเคราะห์ข้อมูล Fungi functional guild (FUNGuild) เบื้องต้น โดยผู้เรียนไม่ต้องดาวน์โหลดโปรแกรมลงบนคอมพิวเตอร์ส่วนตัว เเพียงใช้ Rstudio Cloud
FUNGuild: An open annotation tool for parsing fungal community datasets by ecological guild.
Once we identify fungal taxonomy/species, the next step that would be crucial for microbial ecology is to learn about fungal ecologyical functions. Our example data were generated using FUNGuild which annotate fungal function to each species in our dataset. Today, we will learn how to perform FUNGuild analysis.
Step A: Open Rstudio cloud and Launch Terminal

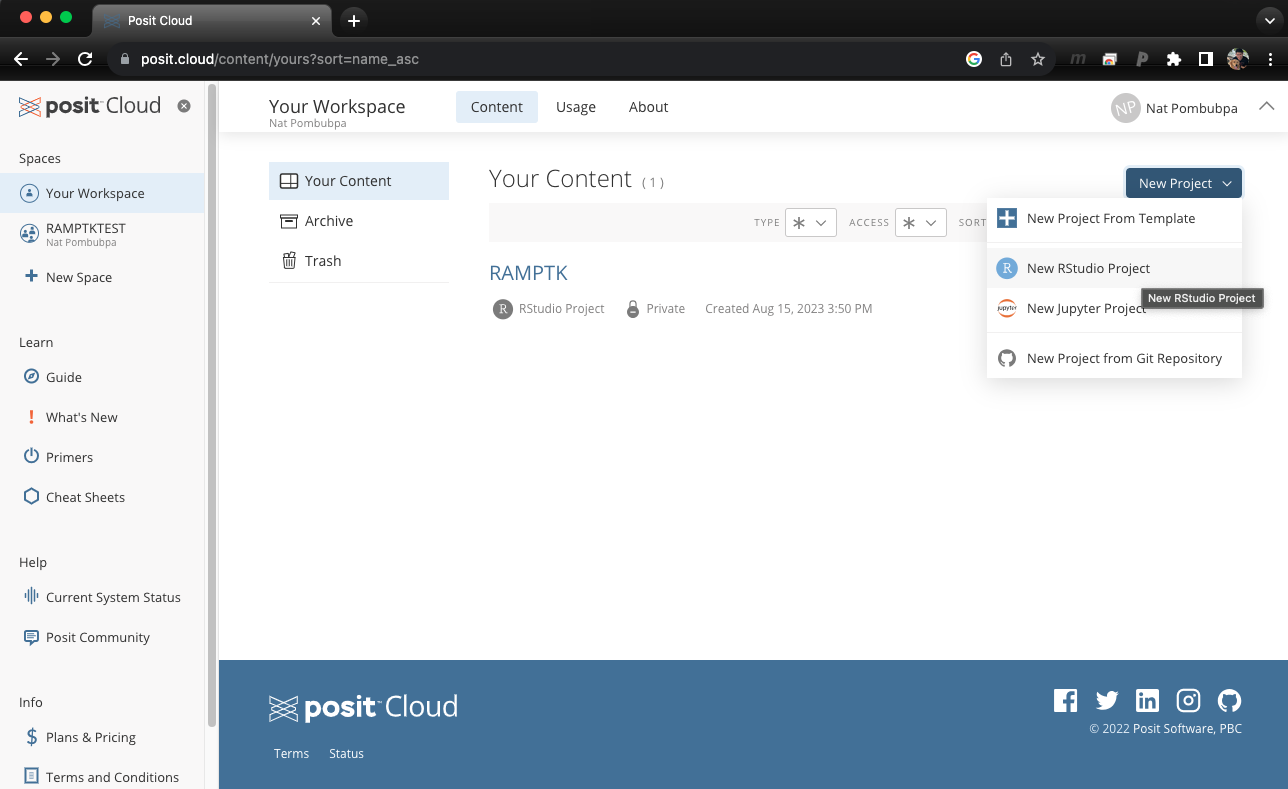
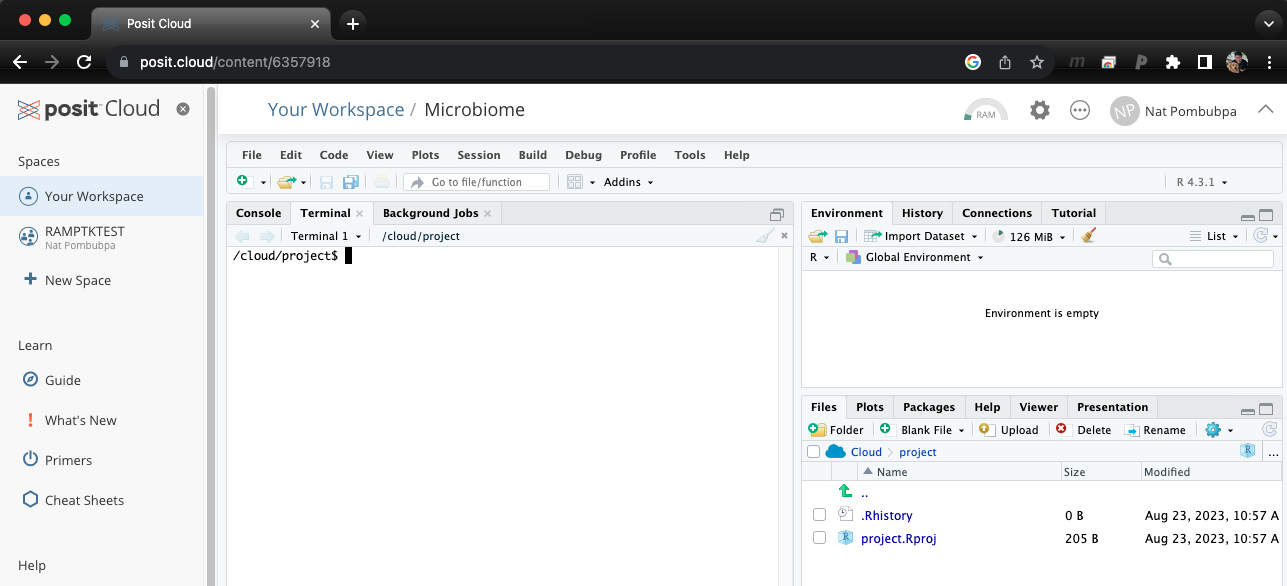
Once you log in to Rstudio cloud, your web browser should bring up a similar window as the picture shown above. Click the button on the top right corner to create a new Rstudio project. Then, the next step is to click “Terminal” which should look like a picture below after you click on it.

Step B: Miniconda set up
# download and install miniconda3 to Rstudio cloud

/cloud/project$ wget https://repo.anaconda.com/miniconda/Miniconda3-latest-Linux-x86_64.sh
/cloud/project$ bash Miniconda3-latest-Linux-x86_64.sh
Check conda installation
/cloud/project$ conda env list
# If there's any issue, try this

/cloud/project$ source ~/.bashrc
If everything work perfectly for you, you are almost ready for the actual analysis.
Step 1: Download FunGuild program
Using git clone to download FunGuild
#Download FUNGuild
/cloud/project$ git clone https://github.com/UMNFuN/FUNGuild
Then, press enter to start downloading process
#Download FUNGuild
/cloud/project$ git clone https://github.com/UMNFuN/FUNGuild
Cloning into 'FUNGuild'...
remote: Enumerating objects: 501, done.
remote: Counting objects: 100% (41/41), done.
remote: Compressing objects: 100% (31/31), done.
remote: Total 501 (delta 20), reused 24 (delta 9), pack-reused 460
Receiving objects: 100% (501/501), 1.05 MiB | 7.15 MiB/s, done.
Resolving deltas: 100% (290/290), done.
When this step completes, FUNGuild folder should appear. Using ls command to see your folder.
/cloud/project$ ls
FUNGuild  project.Rproj
We will start with example data in FUNGuild folder. Change directory to FUNGuild folder and check your working directory. It should be /cloud/project/FUNGuild
/cloud/project$ cd FUNGuild/
/cloud/project/FUNGuild$ pwd
/cloud/project/FUNGuild
Let’s check what we have in FUNGuild folder using ls command
(base) /cloud/project/FUNGuild$ ls
Guilds_v1.1.py                     README.md   example
Miniconda3-latest-Linux-x86_64.sh  deprecated
Step 2: Now, let’s perform FUNGuild annotation
/cloud/project/FUNGuild$ python Guilds_v1.1.py -otu example/otu_table.txt -db fungi
Then, press enter. At the end of this process we will have a taxonomy table for the actual FUNGuild annotation
/cloud/project/FUNGuild$ python Guilds_v1.1.py -otu example/otu_table.txt -db fungi
FunGuild v1.1 Beta
Connecting with FUNGuild database ...

Reading in the OTU table: 'example/otu_table.txt'
At the end of this process we will have a FUNGuild table.
Let’s take a look at our fungi functional guild results
[/cloud/project/FUNGuild]$ awk '{print $1" "$10}' example/otu_table.guilds.txt
OTU trophicMode
OTU_100 Pathotroph
OTU_1002 Symbiotroph
OTU_1003 na
OTU_1008 Saprotroph-Symbiotroph
OTU_1011 Symbiotroph
OTU_1015 na
OTU_1018 na
OTU_1021 Pathotroph-Saprotroph
OTU_1023 Symbiotroph
OTU_1024 na